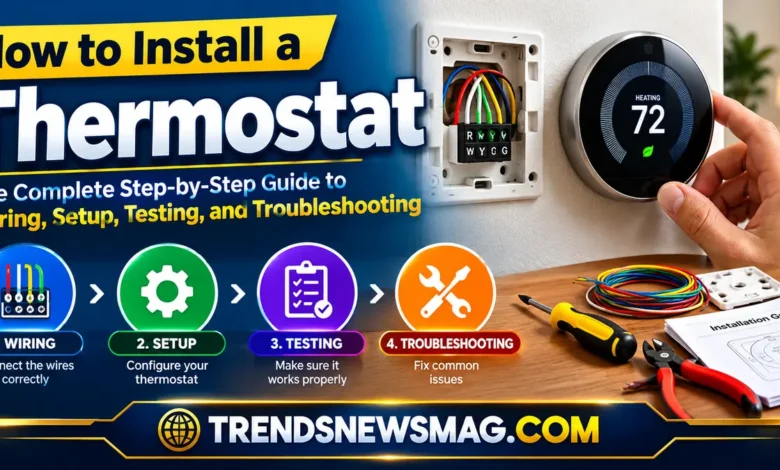
How to Install a Thermostat: The Complete Step-by-Step Guide to Wiring, Setup, Testing, and Troubleshooting

A thermostat may be one of the smallest components in an HVAC system, but it has an outsized effect on comfort, energy use, and equipment performance. A properly installed thermostat tells your heating and cooling system when to run, helps maintain a consistent indoor temperature, and can provide useful scheduling and energy-management features. A poorly installed one can cause short cycling, incorrect temperature readings, loss of heating or cooling, or even damage to HVAC controls.


The good news is that replacing a thermostat is often a manageable home-improvement project when the existing wiring and HVAC system are compatible with the new control. The challenge is knowing exactly what each wire does, understanding whether the system uses conventional or heat-pump equipment, and recognizing when a job is beyond the scope of a simple replacement.
If you are learning how to install a thermostat, the first principle is simple: never treat thermostat wires as interchangeable just because their insulation colors look familiar. Terminal labels, existing system configuration, equipment type, and the manufacturer’s wiring diagram matter much more than color alone.
This guide walks through the entire process, from choosing the right thermostat and documenting the old wiring to mounting the new device, configuring it correctly, testing the HVAC system, and diagnosing problems afterward. It also explains smart thermostats, C-wire requirements, heat pumps, safety considerations, and situations where calling a licensed HVAC professional is the better choice.
Understand Your HVAC System Before You Start
Before learning how to install a thermostat, identify what type of heating and cooling system you have. This step prevents one of the most expensive and frustrating mistakes: purchasing a thermostat that is incompatible with the equipment. A thermostat designed for a conventional furnace and central air system may not be suitable for a heat pump, multi-stage system, electric baseboard heater, or dual-fuel setup.
Most residential central HVAC systems use low-voltage control wiring, commonly around 24 volts AC. That voltage is substantially lower than household line voltage, but it still requires proper handling. Some heating systems, especially electric baseboard and other line-voltage applications, operate at household voltage and require a completely different thermostat.
Look at the existing thermostat and HVAC equipment documentation if available. Labels such as R, Rc, Rh, C, W, Y, G, O, B, AUX, E, or W2 can provide clues about the system configuration. However, those letters describe functions rather than universal wire colors. For example, a red wire is commonly connected to R, but previous installation work may have used a different color.
As the U.S. Department of Energy explains, programmable and properly managed thermostats can help reduce heating and cooling energy consumption by adjusting temperatures when a home is unoccupied or occupants are sleeping. That makes thermostat selection more than a convenience decision; it can be part of an overall HVAC efficiency strategy.
Choose a Thermostat That Matches Your Equipment
Knowing how to install a thermostat starts with choosing the correct replacement. Thermostats vary considerably in capability. A basic digital model may simply control heating and cooling, while a smart thermostat can offer Wi-Fi connectivity, occupancy detection, remote control, learning schedules, humidity information, equipment monitoring, and energy reports.
Compatibility should come before features. Check the thermostat manufacturer’s compatibility guide against your HVAC system. Pay particular attention to heat pumps, two-stage heating or cooling, auxiliary heat, emergency heat, humidifiers, dehumidifiers, dual-fuel systems, and systems that require specialized terminals.
A thermostat’s power requirements are equally important. Many modern smart thermostats require a C wire, also called a common wire, to continuously supply power. Some models can operate without a dedicated C wire through alternative power arrangements, but those solutions are not universally appropriate.
| HVAC configuration | Common thermostat considerations | Important compatibility check |
|---|---|---|
| Single-stage furnace + central AC | R, W, Y, G, C may be present | Confirm heating and cooling stages |
| Heat pump | O/B, Y, G, R, C and auxiliary terminals may be used | Verify reversing-valve configuration |
| Two-stage furnace | W1/W2 or equivalent controls | Thermostat must support multiple stages |
| Two-stage AC | Y1/Y2 may be used | Confirm outdoor unit requirements |
| Smart thermostat | Often needs continuous power | Check C-wire or approved power method |
| Electric baseboard | Line-voltage thermostat | Do not substitute a low-voltage thermostat |
| Multi-zone HVAC | Depends on zoning controller | Compatibility with zone equipment is essential |
The installation instructions supplied with the new thermostat should take priority over generic diagrams. Manufacturers sometimes use different terminal arrangements or configuration procedures even when the basic HVAC functions are similar.
Gather the Right Tools and Prepare the Work Area
For a typical low-voltage thermostat replacement, the physical tools are uncomplicated. A small screwdriver, pencil, masking tape or wire labels, a drill, suitable wall anchors, a level, and a smartphone camera are often enough. The camera is particularly useful because taking a clear photograph of the original wiring gives you a reference before any conductor is disconnected.
The preparation matters more than the number of tools. Turn off power to the HVAC system at the appropriate electrical disconnect or circuit breaker before touching the thermostat wiring. In many homes, the furnace or air handler has a service switch that resembles a light switch and can be used to disconnect power to the equipment.
Do not assume that removing the thermostat from its wall plate makes the wiring safe. The control circuit can still be energized. A non-contact voltage tester may provide additional information, but it should not replace following the manufacturer’s safety procedure or using an appropriate meter when electrical verification is necessary.
Keep small screws and wall anchors organized. If the new thermostat has a backplate that differs significantly from the old one, be prepared to repair or conceal old mounting holes. A clean installation is easier when you have enough time to position the thermostat accurately rather than rushing to finish.
Turn Off HVAC Power and Document the Existing Wiring
Safety is the most important part of how to install a thermostat. Turn off the HVAC equipment before disconnecting wires. Depending on the system, this may involve the furnace or air-handler switch, a circuit breaker, or another approved disconnecting method.
Once power is off, remove the thermostat’s cover carefully. Do not pull on the wires. Examine the terminals and photograph the complete wiring arrangement. Make sure the image is sharp enough to show both the wire colors and the terminal labels.
Next, label each wire according to the terminal it is actually connected to. If a wire is connected to Y, write “Y” on its label. Do not label it merely “yellow” because color is not a reliable functional identifier.
A useful rule is: label the terminal, not the wire color. If the existing thermostat has an unusual configuration, your photograph and labels may be the most valuable information you have if you encounter an unexpected issue during installation.
Some thermostats also have separate Rc and Rh terminals, while others use a single R terminal with an internal jumper. Never remove or add jumpers based on guesswork. Follow the wiring instructions for the replacement thermostat and the HVAC equipment.
Remove the Old Thermostat Without Losing the Wires
After documenting everything and confirming the power is off, loosen the terminal screws and disconnect the wires one at a time. Thermostat wires are relatively thin and can easily disappear into the wall cavity if they are released.
Prevent this by securing the wires with tape, gently wrapping them around a pencil, or holding them while removing the old mounting plate. Leave enough exposed conductor to make a reliable connection to the new thermostat.
Inspect the exposed wire ends. If the copper is heavily oxidized, damaged, excessively short, or poorly stripped, the connection may be unreliable. A thermostat terminal needs enough properly exposed conductor to make solid contact without leaving unnecessary bare copper exposed.
If you discover more wires than expected, stop and identify the system before proceeding. An extra conductor might control a second heating or cooling stage, auxiliary heat, a reversing valve, humidification equipment, or another accessory.
Install the New Thermostat Base Level on the Wall
Positioning is more important than it may appear. A thermostat measures the temperature around itself, so its location can influence how accurately it represents the conditions throughout the room.
Avoid mounting it directly above a heat-producing appliance, near a drafty door, in direct sunlight, beside a supply-air register, or on a wall that experiences unusual temperature swings. Interior walls are often preferable when practical.
Place the new backplate against the wall and use a small level to position it. Mark the screw holes, install suitable anchors where necessary, and secure the plate without overtightening the screws.
If the old thermostat left a larger opening, make sure the new plate adequately covers it. Some manufacturers provide trim plates specifically for replacement installations. A stable, level base helps both appearance and long-term reliability.
Connect the Thermostat Wires by Terminal Function
This is the most technical part of how to install a thermostat, but it becomes much easier when you focus on terminal functions rather than wire colors.
R generally represents the 24-volt power supply from the HVAC transformer. C is commonly the 24-volt common connection used to complete the power circuit for many thermostats, particularly smart models. W is generally associated with heating, Y with compressor or cooling control, and G with indoor fan control.
Heat-pump systems add complexity. O or B may control the reversing valve, depending on the equipment and thermostat configuration. Some systems use O for one operating mode and B for another. AUX or E can be associated with auxiliary or emergency heat.
Never assume that an O/B terminal can be configured arbitrarily. Heat-pump reversing-valve behavior varies by system, and an incorrect configuration can make the unit appear to heat when it should cool or vice versa.
Insert each conductor into the correct terminal according to the new thermostat’s wiring diagram. Make sure the conductor is secure and that no loose strands can contact adjacent terminals.
If your new thermostat uses a different terminal arrangement from the old thermostat, do not attempt to copy the physical position of the wires. Translate the old system’s functions into the new thermostat’s terminal design.
Understand the C Wire and Smart Thermostat Power
The C wire deserves special attention because it is one of the most common sources of confusion when upgrading to a smart thermostat. A C wire provides a continuous common connection that allows many smart thermostats to draw the power they need for their display, Wi-Fi connection, sensors, and processor.
If your old thermostat did not use C, that does not automatically mean a C wire is absent. There may be an unused conductor tucked behind the wall or connected at the furnace but not at the thermostat. Conversely, a wire that looks unused at the thermostat may not be connected at the equipment end.
If you are learning how to install a thermostat with Wi-Fi capability, inspect the furnace or air-handler control board when the manufacturer’s instructions specifically call for it. Look for the corresponding thermostat cable and the terminal labeled C. The equipment-side wiring must match the thermostat-side configuration.
Do not connect a random wire to C simply because the smart thermostat requires it. You need to verify where the conductor terminates at the HVAC equipment. If the existing cable lacks a suitable conductor, some manufacturers offer approved power adapters or alternative installation methods, but those must be compatible with the particular system.
Configure Heat Pumps and Multi-Stage Systems Correctly
Heat pumps require more careful setup because they can provide both heating and cooling using a reversing valve. The thermostat needs to know how that valve operates. Depending on the equipment, the reversing valve may be energized during cooling or during heating.
The thermostat’s setup menu may ask whether the system is conventional or heat pump, how many heating and cooling stages are installed, whether auxiliary heat exists, and whether the reversing valve should be energized in heating or cooling mode.
Multi-stage systems require similar attention. A two-stage furnace, for example, can use separate calls for first-stage and second-stage heat. A thermostat that supports only one stage may not take advantage of the equipment’s intended control strategy.
When in doubt, use the model numbers of the furnace, air handler, heat pump, or outdoor condenser to consult the manufacturer’s documentation. The equipment installation manual is more reliable than a generic wiring chart found online.
Attach the Thermostat Display and Complete Initial Setup
Once the wires are connected and the base is firmly mounted, attach the thermostat’s display or control module according to the manufacturer’s instructions. Do not force it into position. A display that does not seat correctly may indicate that the base is misaligned or that a wire is interfering with the connection.
Restore power to the HVAC equipment. The thermostat should boot, illuminate, or otherwise indicate that power is available. Smart models may take additional time to initialize and may guide you through Wi-Fi setup.
During initial configuration, select the correct equipment type and number of heating and cooling stages. Set the temperature scale, date and time, fan mode, and other available preferences. If the thermostat offers an equipment test mode, use it as directed.
A common mistake is to treat setup as an optional convenience. It is not. A thermostat that is physically wired correctly but configured for the wrong HVAC type can still behave incorrectly.
Test Heating, Cooling, and Fan Operation
Testing is a critical part of how to install a thermostat successfully. Do not consider the job complete simply because the thermostat display turns on.
Test each operating mode that your system supports. For cooling, set the desired temperature low enough to create a call for cooling. Allow the system time to respond. For heating, reverse the process by setting the target temperature above the current room temperature.
The indoor blower should respond appropriately, and the outdoor equipment should operate when a cooling or heat-pump call requires it. Listen for unusual buzzing, repeated clicking, rapid cycling, or other abnormal behavior.
Do not repeatedly switch rapidly between heating and cooling modes as a test. Many HVAC systems incorporate a compressor protection delay to prevent immediate restarting. Give the equipment time to respond.
A thermostat should generally maintain a stable relationship with the HVAC system rather than causing repeated starts and stops. If the equipment starts, stops, and restarts unusually often, investigate the thermostat configuration and HVAC controls rather than assuming the behavior is normal.
Check Thermostat Accuracy and Placement
After installation, compare the thermostat’s displayed temperature with a reliable room thermometer placed nearby. Do not expect every inexpensive thermometer to agree perfectly; household temperature sensors can vary slightly.
If the thermostat is consistently reading several degrees differently, examine its environment first. A thermostat installed near a draft, window, exterior wall, return-air problem, or heat-producing electronics may measure a local microclimate rather than the room’s average conditions.
Many modern thermostats provide temperature calibration or offset settings. Use these only when appropriate. Calibration should not be used to hide an installation problem.
Humidity readings can also vary by location and sensor. If humidity control is important for your home, especially in climates with significant moisture, consider the thermostat’s sensor specifications and placement as part of the HVAC system design.
Troubleshoot Common Thermostat Installation Problems
One of the most common problems after replacing a thermostat is a blank display. Possible causes include an interrupted HVAC power supply, blown low-voltage fuse, missing C-wire connection, incorrect wiring, or an incompatible thermostat. Check the manufacturer’s troubleshooting instructions before repeatedly cycling breakers or reconnecting wires.
If heating works but cooling does not, inspect the Y connection and confirm that the thermostat is configured for cooling. If the fan operates manually but does not run with heating or cooling calls, check the G connection and system configuration.
If cooling runs when heating is selected on a heat pump, investigate the O/B configuration. This symptom can point directly toward an incorrect reversing-valve setting.
If the thermostat repeatedly calls for heating or cooling, consider whether the temperature differential, cycle-rate setting, equipment staging, or thermostat location is appropriate. Mechanical HVAC faults can produce similar symptoms, so not every problem that appears after installation is actually caused by the thermostat.
When dealing with unfamiliar wiring, damaged conductors, line-voltage equipment, or repeated blown fuses, professional diagnosis is safer than experimentation.
Avoid These Common Installation Mistakes
A frequent mistake is assuming that wire color determines function. While standard conventions exist, previous installers may have used nonstandard colors, especially when extending or modifying wiring.
Another problem is failing to photograph the original terminals before disconnecting the wires. Once the old thermostat is removed, it can be surprisingly difficult to reconstruct which conductor was connected where.
Installing a smart thermostat without confirming power requirements is another common issue. A thermostat can be an excellent upgrade, but Wi-Fi functionality does not make an incompatible electrical arrangement compatible.
Do not ignore manufacturer instructions because a generic online diagram looks simpler. HVAC control systems differ, and even thermostats from the same brand can have different terminal requirements.
Finally, avoid rushing through testing. A thermostat may appear to work while one stage, auxiliary heat function, fan control, or reversing-valve mode remains incorrectly configured.
Know When Professional Installation Is the Better Choice
Knowing how to install a thermostat also means knowing when not to do it yourself. A straightforward replacement involving a conventional low-voltage furnace and air-conditioning system is often relatively simple for a careful homeowner. More complex systems are different.
Professional assistance is advisable when the system uses line voltage, unfamiliar wiring, multiple transformers, zoning controls, dual-fuel equipment, unusual accessories, or complicated heat-pump configurations. Electrical work inside HVAC equipment can also present hazards beyond the thermostat itself.
A qualified HVAC technician can diagnose the complete control circuit rather than simply swapping the wall device. That distinction matters when the original thermostat failed because of a blown fuse, transformer issue, wiring fault, condensate safety switch, or equipment-control problem.
As the U.S. Consumer Product Safety Commission’s broader electrical-safety guidance emphasizes, electrical equipment should be approached with appropriate caution. For homeowners who are uncertain about the voltage or wiring configuration, professional help is a sensible investment rather than an unnecessary expense.
Improve Energy Efficiency After Installation
A correctly installed thermostat is only part of an efficient HVAC system. The way you program and use it can have a substantial effect on energy consumption.
Avoid creating extreme temperature changes that force the HVAC system to work unnecessarily hard. Instead, use reasonable setbacks when the home is unoccupied or overnight, provided they suit the equipment and occupants.
Smart thermostats can make scheduling easier by allowing remote adjustments and automated routines. Some models learn patterns or use occupancy information, while others simply provide a convenient programmable schedule.
The ideal settings depend on climate, insulation, HVAC equipment, household routines, and personal comfort. A thermostat cannot compensate for a poorly maintained air conditioner, clogged filter, leaking ductwork, inadequate insulation, or incorrectly sized HVAC system.
For broader information about residential energy efficiency, the U.S. Department of Energy’s Energy Saver resources provide authoritative guidance on heating, cooling, thermostats, and home energy use.
Understand Programmable and Smart Thermostat Features
Programmable thermostats allow homeowners to establish different temperature targets throughout the day. A simple weekday/weekend schedule can be enough for households with predictable routines.
Smart thermostats extend this concept with connectivity and automation. Depending on the model, you may be able to adjust settings remotely, receive maintenance notifications, view energy reports, integrate room sensors, or coordinate the thermostat with other smart-home devices.
More features do not automatically mean better performance. A complicated automation system that constantly overrides your preferred settings can be less convenient than a simple programmable thermostat. The best device is one that matches your household habits and HVAC equipment.
Smart features should therefore be considered after compatibility, reliability, and basic HVAC control. A beautifully designed thermostat that cannot correctly operate your heat pump is not an upgrade.
Protect the HVAC System With Proper Maintenance
Thermostat installation does not eliminate the need for routine HVAC maintenance. Filters should be replaced or cleaned according to the equipment manufacturer’s recommendations and household conditions. Outdoor coils should remain reasonably clear of debris, and condensate drainage should be maintained where applicable.
If your system has recurring problems, investigate them instead of continually adjusting the thermostat. Poor airflow, refrigerant problems, dirty coils, faulty capacitors, blocked filters, and failing blower components can all affect comfort.
The thermostat is effectively the messenger between the occupants and HVAC equipment. If the equipment cannot deliver what the thermostat requests, changing thermostat settings will not solve the underlying mechanical problem.
A useful way to think about it is: the thermostat controls demand; the HVAC system supplies the demand. Both sides need to function properly for the home to remain comfortable.
What a Successful Installation Should Look Like
After you finish, the thermostat should be firmly mounted, level, securely connected, and correctly configured for the HVAC system. The display should remain stable, temperature readings should be plausible, and heating, cooling, and fan functions should respond as expected.
There should be no exposed conductor that can accidentally touch another terminal. Wires should not be under excessive mechanical tension, and the thermostat should sit securely on its base.
The system should also respect any built-in compressor protection delays or staging logic. A short pause before cooling starts is not necessarily a malfunction; many systems intentionally delay compressor operation.
Most importantly, the installation should leave you with a clear understanding of what each connected terminal does. If something goes wrong later, that documentation can make troubleshooting considerably easier.
Frequently Asked Questions About Thermostat Installation
Can a homeowner replace a thermostat without an HVAC technician?
Yes, many homeowners can replace a compatible low-voltage thermostat themselves if they are comfortable following electrical safety procedures and the manufacturer’s wiring instructions. The task becomes substantially more complicated with line-voltage systems, heat pumps, multi-stage equipment, zoning controls, or unusual wiring. When the system configuration is uncertain, professional installation is the safer choice.
How long does thermostat replacement usually take?
A straightforward thermostat replacement can often be completed in under an hour, although the total time depends on the equipment, wall condition, wiring, and setup requirements. If you need to identify an unused C wire, modify the mounting location, configure multiple stages, or troubleshoot existing HVAC faults, the project can take considerably longer.
What happens if thermostat wires are connected incorrectly?
Incorrect wiring can prevent heating, cooling, or fan operation and may cause unexpected equipment behavior. In some situations, a wiring error can damage low-voltage components such as a fuse, transformer, or control board. This is why understanding how to install a thermostat involves documenting the original terminal connections and following the replacement manufacturer’s diagram rather than relying solely on wire colors.
Do all smart thermostats need a C wire?
No. Some smart thermostats can operate using alternative power-management methods, while others specifically require a C-wire connection. Compatibility varies by thermostat and HVAC system. Before purchasing a smart thermostat, check its official compatibility information and determine whether a C wire is available and correctly connected at the HVAC equipment.
Why is my thermostat blank after installation?
A blank thermostat can result from a lack of HVAC power, an incorrect connection, a missing common connection, a blown low-voltage fuse, or an incompatible device. First confirm that power has been restored according to the equipment manufacturer’s procedure. If the thermostat remains blank, avoid repeatedly changing connections without identifying the system’s wiring and power arrangement.
Why does my heat pump blow cool air when I select heat?
A heat pump can initially feel different from a conventional furnace because its supply air may not feel extremely hot. However, if the system genuinely operates in cooling mode while the thermostat calls for heating, the reversing-valve configuration may be incorrect. Check the thermostat’s O/B configuration against the heat-pump manufacturer’s specifications rather than guessing which setting is correct.
Should the thermostat be installed near an air vent?
Generally, no. A supply vent can expose the thermostat to air that is substantially warmer or cooler than the rest of the room, causing inaccurate temperature readings and unnecessary HVAC cycling. Avoid direct sunlight, exterior drafts, doors, windows, and other localized heat sources as well.
Can I use the old thermostat’s wiring for a new thermostat?
Often, yes, particularly when replacing one compatible low-voltage thermostat with another. However, the new device may require additional conductors or different terminal connections. The old wiring should be identified by terminal function, and compatibility should be confirmed before installation.
How do I know whether my system is conventional or a heat pump?
Look at the HVAC equipment model information, existing thermostat configuration, and manufacturer documentation. A heat pump commonly uses a reversing-valve connection such as O or B and may have auxiliary or emergency heat controls. Because wiring can vary, equipment documentation is more reliable than appearance alone.
Is learning how to install a thermostat enough to fix HVAC problems?
No. A thermostat can request heating or cooling, but it cannot repair mechanical or electrical problems elsewhere in the HVAC system. If the thermostat is operating normally but the furnace, air conditioner, heat pump, blower, or outdoor unit is malfunctioning, the underlying equipment needs to be diagnosed separately.
Conclusion: A Careful Installation Makes a Bigger Difference Than a Fancy Thermostat
Learning how to install a thermostat is ultimately about more than attaching a new device to the wall. The successful approach combines equipment compatibility, electrical safety, accurate wire identification, careful mounting, correct configuration, and thorough testing.
The most important lesson is to identify terminal functions rather than trusting wire colors. Photograph the existing installation before disconnecting anything, shut off HVAC power, keep the conductors from disappearing into the wall, and follow the new thermostat manufacturer’s wiring and setup instructions closely.
Pay particular attention to C-wire requirements, heat-pump reversing valves, auxiliary heat, and multi-stage equipment. These are the areas where a seemingly simple replacement can become complicated.
Once installation is complete, test every applicable operating mode and give the system enough time to respond normally. A thermostat that looks correct on the wall is not necessarily correctly configured behind it.
For homeowners with a straightforward low-voltage HVAC system, careful preparation can make replacement a manageable project. For line-voltage equipment, unfamiliar wiring, complex heat pumps, zoning systems, or anything that raises safety concerns, a qualified HVAC professional is the appropriate choice.
A thermostat is a small control, but it sits at the intersection of comfort, equipment operation, and energy use. Install it correctly, configure it thoughtfully, and maintain the HVAC system around it, and you have a much better foundation for reliable year-round comfort.
Trending Today: AI SAFETY SHOULD BE MEASURED BY AUTHORITY, NOT INTELLIGENCE